# Firmware
Now that you have your CDEM PCB, it is time to upload the firmware into the ESP12 chipset.
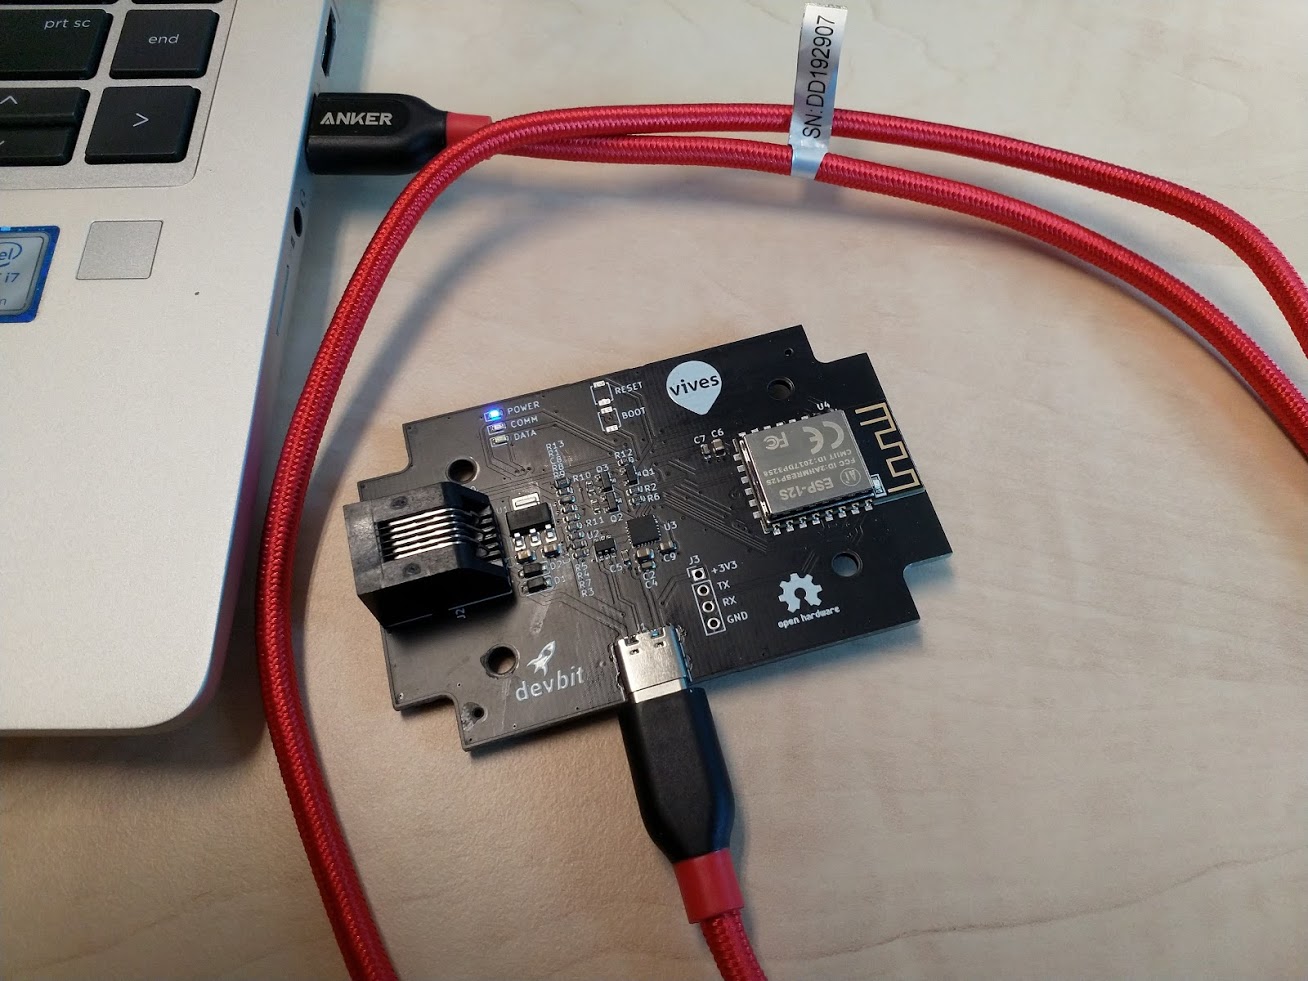
Connect the PCB to your computer using a USB-C cable and follow the guide below to flash the device with the latest firmware.
# Install Arduino IDE
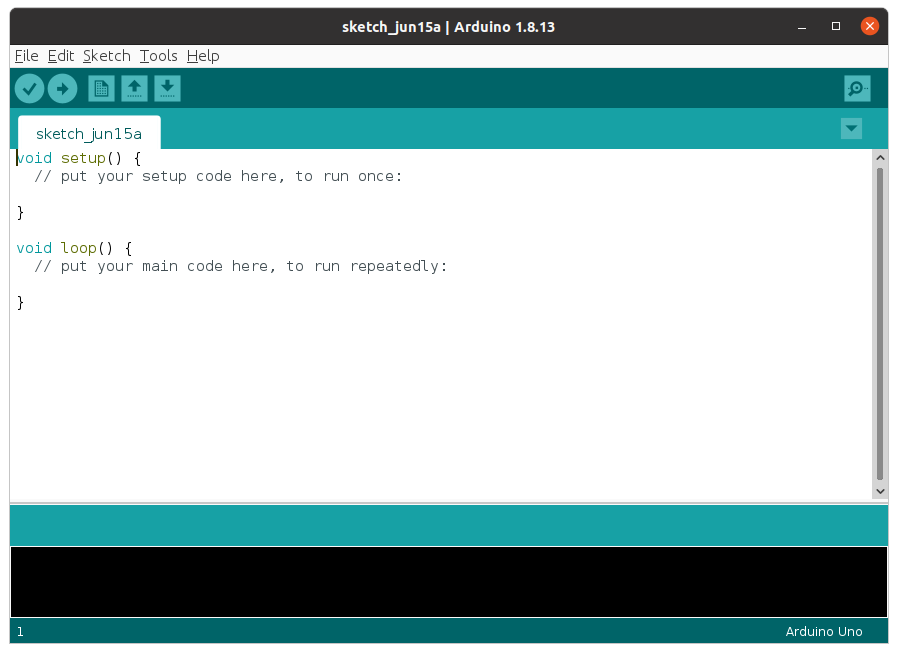
In order to compile and flash the firmware for your CDEM device, you will need to install Arduino IDE.
Instructions on how to install this IDE for most operating systems can be found on the website of Arduino (opens new window) itself.
Once installed, start the IDE to continue.
# Install ESP12 Board Package and Tools
Before any applications can be compiled for the ESP12, the board support package and tools need to be installed.
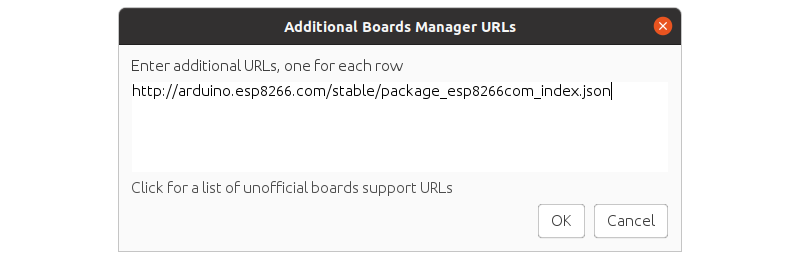
Navigate to File => Preferences and add the stable release link http://arduino.esp8266.com/stable/package_esp8266com_index.json to the Additional Boards Manager URLs. Multiple URLs can be added by clicking the small window icon next to the input field and using one URL per line.
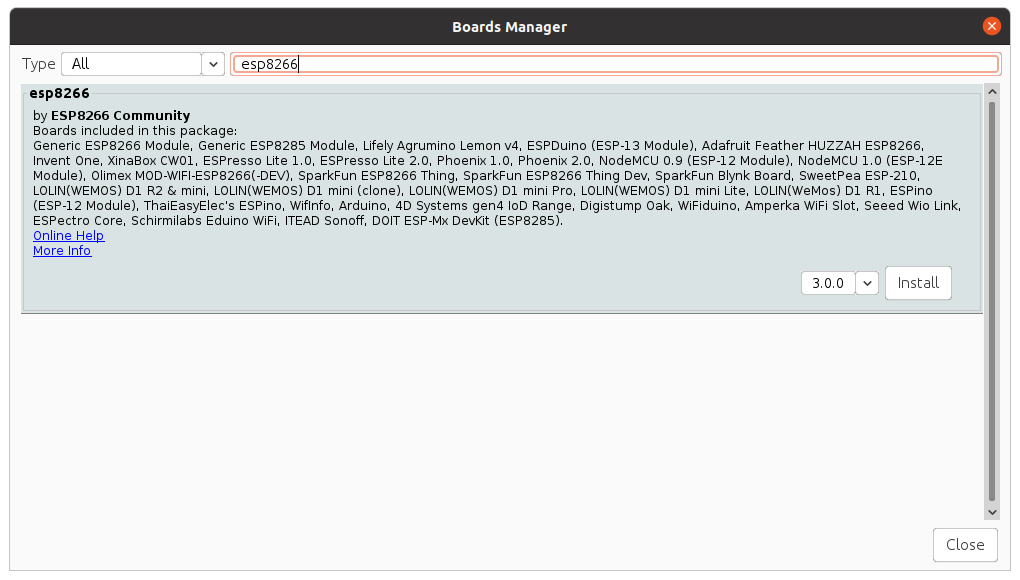
Open Tools => Board => Board Manager ... and search for esp8266. Next install the esp8266 by Community (the CDEM firmware is tested with v3.0.0).
# Download the Latest Firmware
Download the latest firmware for the ESP12 from the CDEM Firmware GitHub page (opens new window).
Latest Firmware
Make sure to download the latest firmware so you are up-to-date with the latest changes.
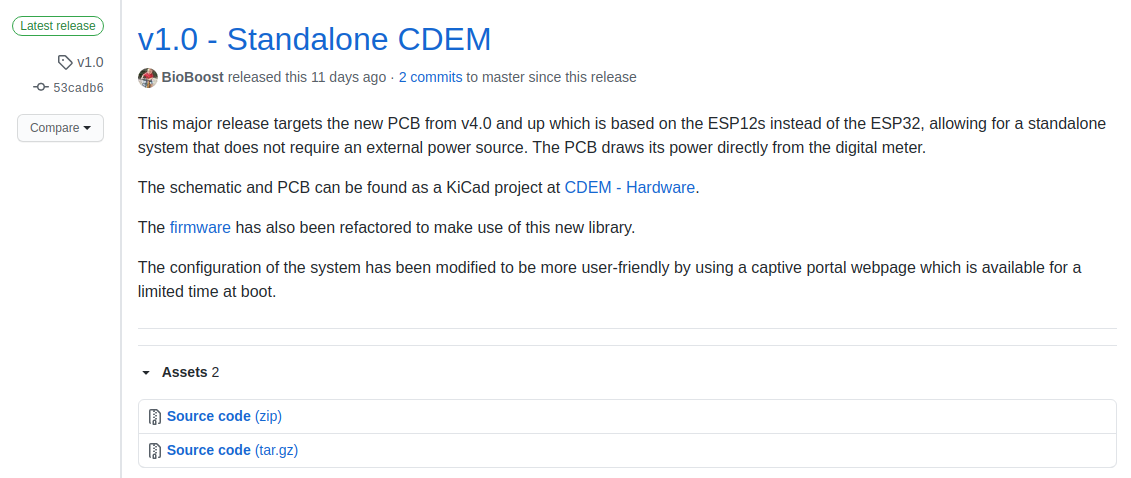
Note that the v1.x releases targeted the old hardware (using ESP32) while the newer v2.x and up releases target the standalone ESP12 system (PCB v4.0 and up).
For more information on the versions see our Technical information.
Under Assets you will find the source code ZIP file. Download this file to your local system.

Extract the ZIP file somewhere on your system.
🐑 Git Clone
You can also clone the project using GIT if you are familiar with it. That way you can easily pull new updates from our code repository.
To clone the project just execute the command git clone https://github.com/connected-digital-energy-meter/cdem-firmware.git somewhere you wish to store the project.
Open Arduino IDE and traverse to the location you extracted the ZIP file. Select the project and open it.
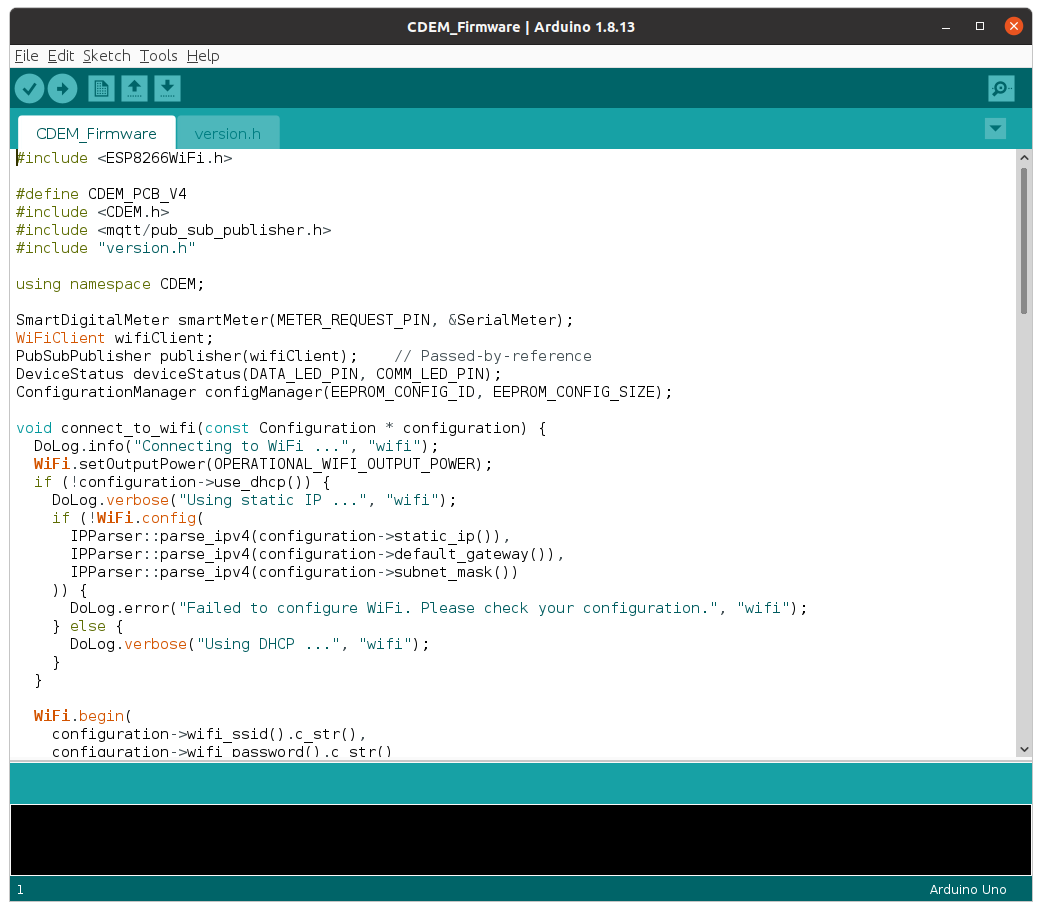
Now select the Generic ESP8266 Module board from the Tools => Board => ESP8266 Boards menu after installation. Select the correct COM-port from Tools => Port (make sure the device is connected to your computer).
Next you will be required to install the different libraries the firmware depends on to do its work.
# Installing the Required Libraries
Several libraries have to be installed in order for the firmware to be compiled. The following sections describe how each library can be installed.
😺 Git
If you are familiar with git you can also clone the library repositories in your user home directory under Arduino/libraries and checkout the required release tags. The Arduino/libraries path is automatically included when the project is compiled.
# The CDEM Library
The firmware for the ESP12 module you downloaded is only the tip of the iceberg. Most of the functionality of the firmware is provided by the Connected Digital Energy Meter library.
Download the latest release of the Connected Digital Energy Meter library (opens new window) as a zip file to your local system.
Make sure that you have opened the firmware project in the Arduino IDE. Next include the CDEM library via Sketch => Include Library => Add ZIP Library ....
# The PubSubClient Library
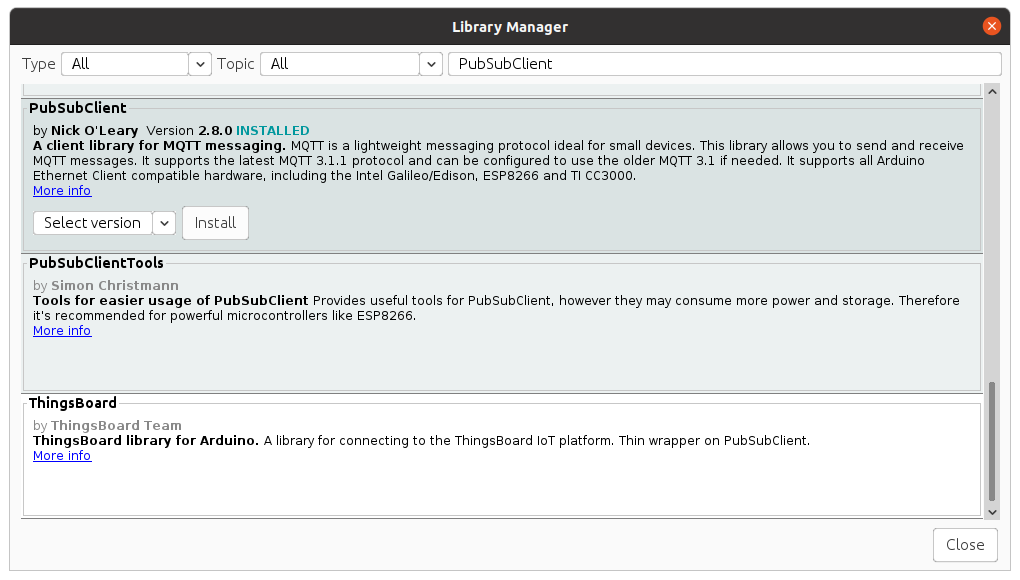
PubSubClient is a client library for MQTT messaging.
- Open the Arduino Library Manager via
Tools => Manage Libraries - Search for
PubSubClient(make sure to use the library by Nick O'Leary) - Select the version:
2.8.0 - Click install.
🚨 Other MQTT Libraries
There are a lot of other MQTT libraries out there and each has its pitfalls. PubSubClient is one of the most mature which is still being maintained.
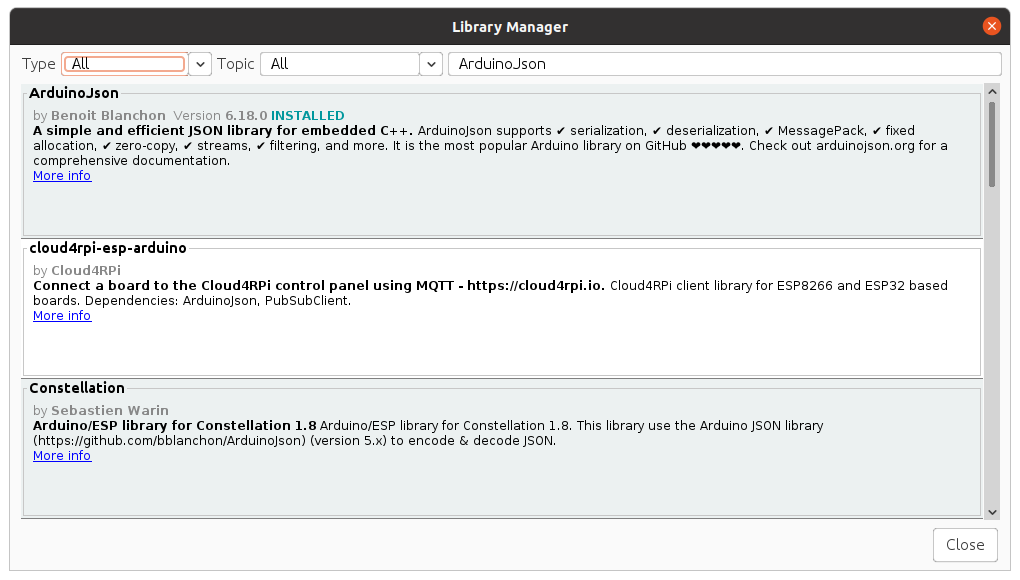
# The ArduinoJson Library
The ArduinoJson library allows easy parsing and conversion of JSON strings. The full payload of all the meter telemetry is transmitted as JSON.
- Open the Arduino Library Manager via
Tools => Manage Libraries - Search for
ArduinoJson(make sure to use the library by Benoit Blanchon) - Select the version:
6.18.0 - Click install.
# Compile and Upload the Firmware
Make sure your CDEM is connected to your host PC via USB and that the correct port is selected.
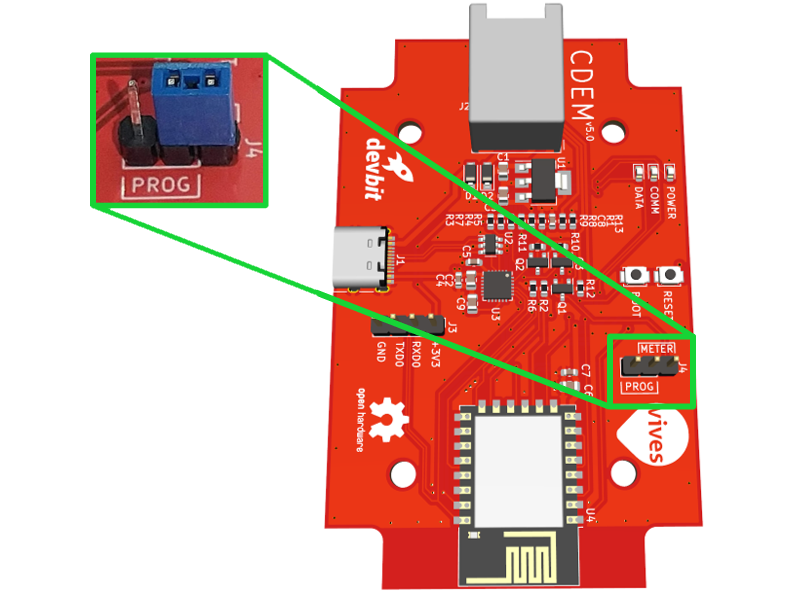
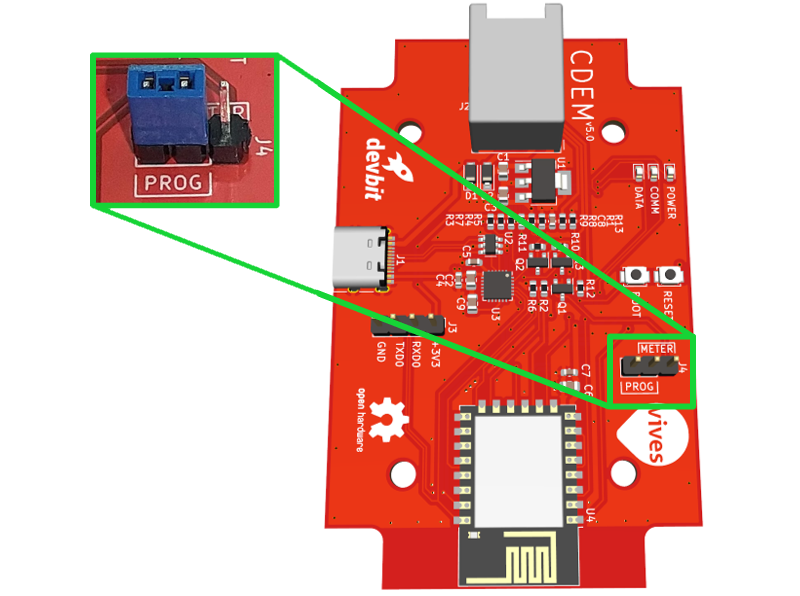
Before trying to upload your firmware to your CDEM device, make sure that the jumper is in the programming position as shown in the next image.
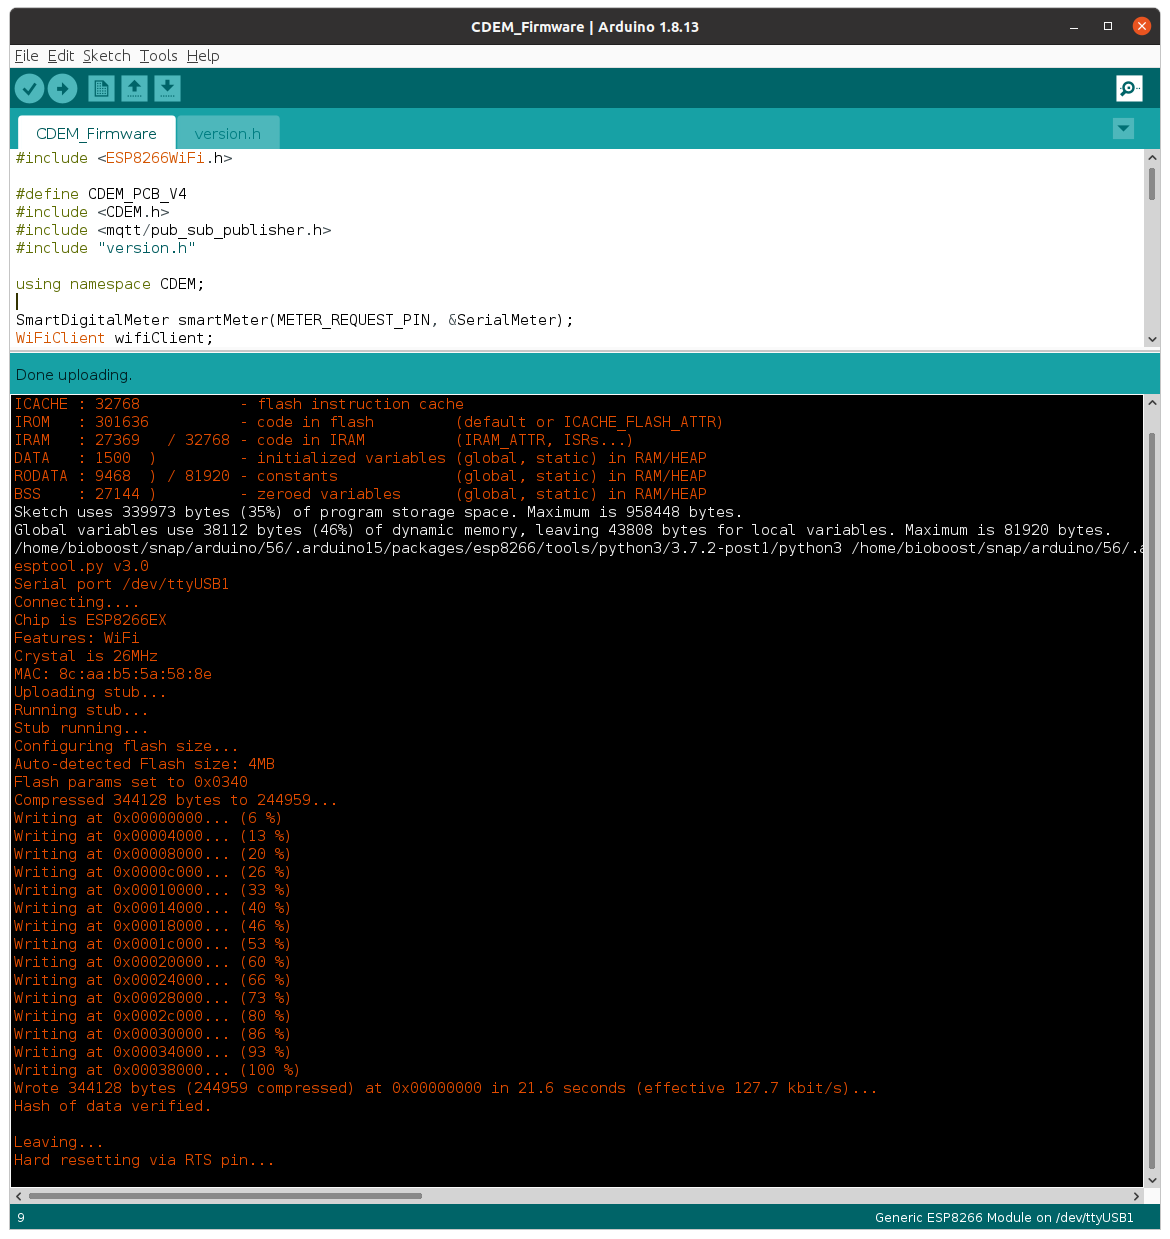
Select the Upload button and watch the magic happen. If all went well you should get similar output to that shown below.
After a couple of seconds the device should start to output messages to the serial monitor.
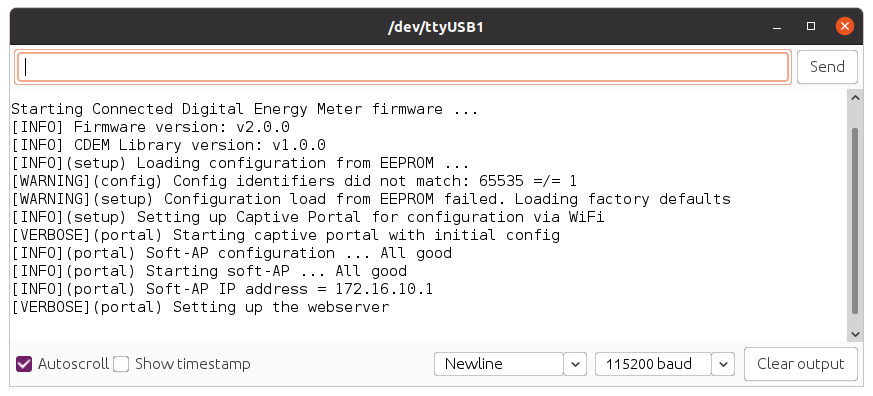
The green communication LED on the board should start to blink with an interval of about 2 seconds. This means that the device has put up a WiFi access point and is awaiting configuration.
Don't forget to put back the jumper into the meter position after uploading the firmware or the device will not be able to read the data from the meter later on.